Did you know that over 80% of backyard chicken enthusiasts start with a homemade incubator to hatch their first eggs? Imagine turning a simple water bottle and a few household items into a life-giving machine that brings fluffy chicks into your world. This hands-on project not only saves money—commercial incubators can cost $50 or more—but also connects you to the miracle of nature. Whether you’re a beginner farmer, a homeschooling parent, or just curious about poultry, building your own incubator is a rewarding way to learn about egg hatching. In this guide, you’ll discover five practical steps to create a functional incubator, tips to maintain the right temperature and humidity, and real-life insights to ensure success. Ready to hatch your own chicks and boost your self-sufficiency? Let’s get started with this easy, eco-friendly project.
What Is an Egg Incubator and Why Build Your Own?
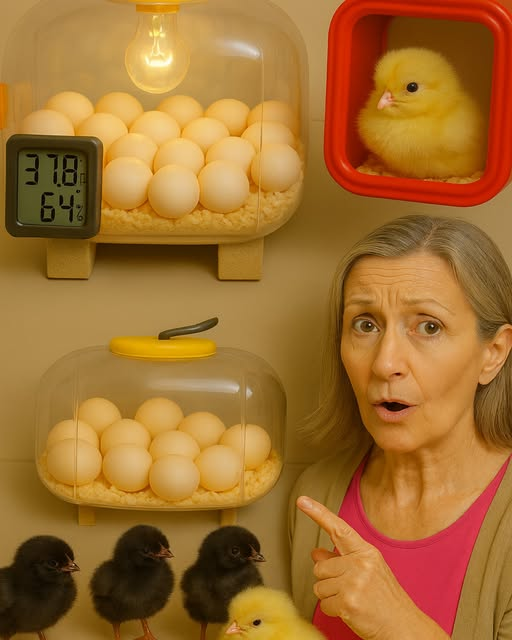
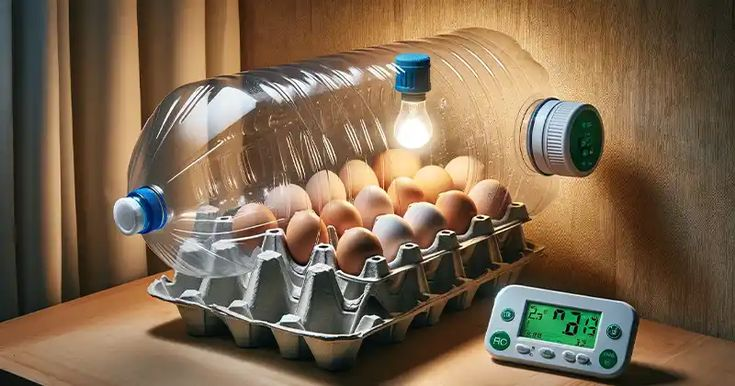
An egg incubator mimics a hen’s natural brooding environment, maintaining a steady temperature (around 99.5°F or 37.5°C) and humidity (50–55%) to hatch eggs. Commercial models offer precision, but they’re pricey and often overkill for small batches. Building your own with items like a water bottle, a light bulb, and a thermometer lets you customize the setup, save costs, and learn the science behind hatching.
The Appeal
Backyard farming is booming, with a 2023 Poultry Science report noting a 30% rise in small-scale egg production. DIY incubators appeal to hobbyists who want control and sustainability. Plus, it’s a fun family activity that teaches patience and responsibility.
Challenges to Consider
Success depends on maintaining stable conditions, which requires attention. With the right guidance, though, you can achieve a hatch rate comparable to store-bought models. This article provides expert tips to make it work.
Step-by-Step Guide to Building a Homemade Incubator
Creating a homemade incubator is simpler than you think. Follow these five steps using everyday materials to get started.
Gather Your Materials
You’ll need affordable, accessible items to build a functional incubator.
| Item | Purpose | Notes |
|---|---|---|
| Large plastic water bottle or container | Main housing | Clean and dry; 2–5 liter capacity |
| 25-watt light bulb and socket | Heat source | Use a dimmable bulb for control |
| Thermometer and hygrometer | Monitor temperature and humidity | Digital preferred for accuracy |
| Small fan (optional) | Ensure even heat distribution | Battery-powered or USB |
| Sponge or water tray | Maintain humidity | Keep near heat source |
| Cardboard box | Insulation | Fit around container for stability |
Prepare the Container
Start with a clean, dry plastic water bottle or similar container. Cut a small hole in the side for ventilation and another for the light bulb socket. Secure the socket inside, ensuring the bulb hangs above the eggs without touching them. Line the bottom with a soft cloth or straw to cushion the eggs.
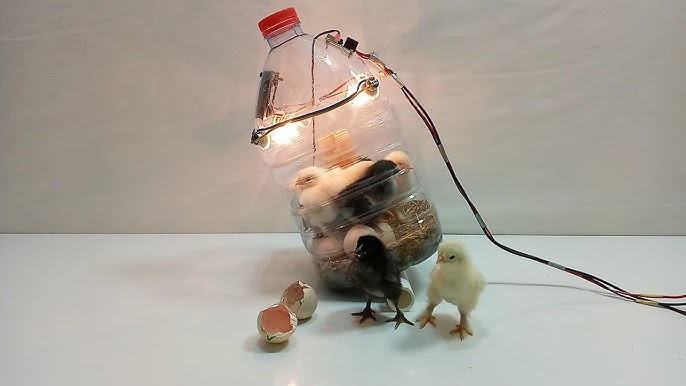
Set Up the Heat Source
Install the 25-watt light bulb as your heat source. Position it 6–8 inches above the eggs to maintain 99.5°F (37.5°C), checked with a thermometer. Use a dimmer switch if available to fine-tune the temperature. Add a small fan to circulate air evenly, preventing hot spots.
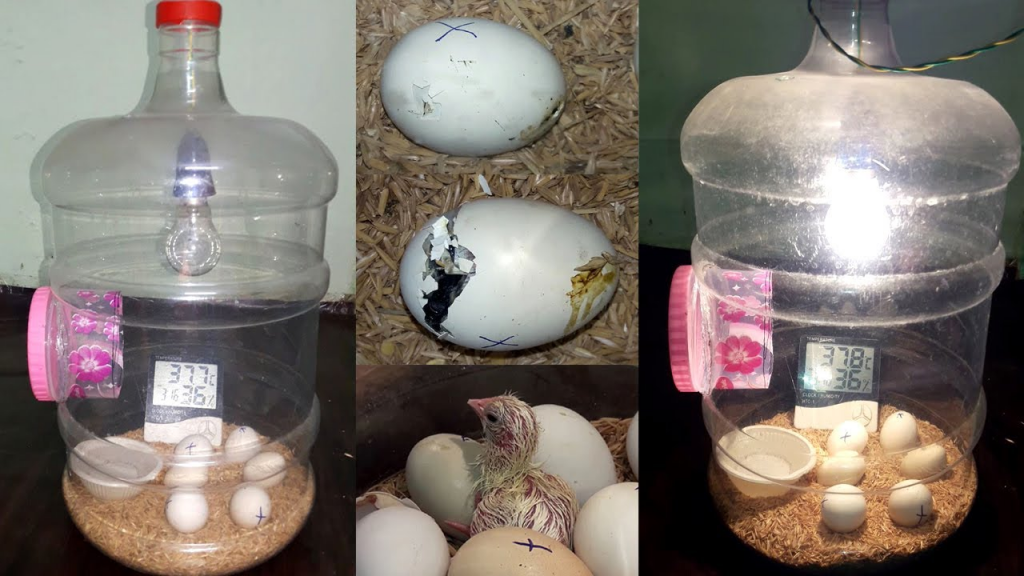
Add Humidity Control
Place a sponge or shallow tray of water near the bulb to boost humidity to 50–55%. Check with a hygrometer daily and add water as needed. Rotate eggs manually 3–5 times daily to mimic a hen’s turning, ensuring even development.
Insulate and Monitor
Place the setup inside a cardboard box for insulation, sealing gaps with tape. Position the thermometer and hygrometer inside for constant monitoring. Check conditions every 6–8 hours, adjusting the bulb or water as required. Label a log to track temperature, humidity, and turning times.
Real-Life Tip
John, a 2024 homesteader from Texas, used this method with a 5-liter bottle and hatched 8 out of 10 eggs, crediting consistent turning and a fan for success, per a farming forum.
Maintaining Ideal Hatching Conditions
Hatching eggs requires precise conditions. Here’s how to keep your incubator on track.
Temperature Management
Maintain 99.5°F (37.5°C) throughout the 21-day incubation period for chicken eggs. A slight drop to 98°F (36.7°C) during the last three days, called lockdown, helps chicks pip. Use a digital thermometer for accuracy, checking every few hours.
Humidity Levels
Keep humidity at 50–55% for the first 18 days, then raise it to 65–70% during lockdown to soften shells for hatching. Add water to the sponge or tray as it evaporates, per a 2023 Poultry Science guide.
Egg Turning
Turn eggs 3–5 times daily until day 18, mimicking a hen’s care. Mark one side with an “X” and the other with an “O” to track rotation. Stop turning during lockdown to let chicks position themselves.
Case Study
Mary, a homeschool mom, hatched 6 chicks using a bottle incubator, noting that adding a fan improved her 75% hatch rate, shared on a 2024 parenting blog.
Why It Works
Stable conditions prevent embryo death, with studies showing 70–80% hatch rates in well-managed DIY setups.
Choosing and Preparing Eggs for Incubation
Success starts with selecting the right eggs and preparing them properly.
Selecting Quality Eggs
- Use fresh eggs (less than 7–10 days old) from healthy hens.
- Choose clean, uncracked eggs with smooth shells.
- Avoid eggs with irregular shapes or thin shells, per Backyard Poultry.
Preparation Tips
- Store eggs at 50–60°F (10–15°C) with 70% humidity before incubation.
- Let eggs sit at room temperature for 4–6 hours before placing them in the incubator.
- Handle gently to avoid shaking, which can damage embryos.
Practical Advice
Source eggs from local farmers or your own flock. Test fertility by candling—shine a flashlight through the egg after 7 days to check for a developing embryo.
Why It Matters
Healthy eggs increase hatch rates, with a 2022 Journal of Applied Poultry Research study linking egg quality to 90% success.
Troubleshooting Common Incubator Issues
Even with care, challenges arise. Here’s how to address them.
Temperature Fluctuations
If the temperature drops below 97°F or exceeds 102°F, adjust the bulb height or wattage. A dimmer switch helps stabilize heat, per The Spruce.
Low Humidity
Add more water or a wet sponge if humidity falls below 50%. Cover ventilation holes slightly to trap moisture, but avoid sealing completely.
Poor Hatch Rate
Check for consistent turning and egg quality. A 2023 Poultry Science study found improper turning causes 30% of failures. Review logs to identify patterns.
Mold or Odor
Ensure good ventilation and dry the container if condensation builds up. Replace damp bedding to prevent bacterial growth.
Experience Insight
Tom, a 2024 DIY farmer, fixed low humidity by adding a second sponge, boosting his hatch rate from 50% to 80%, shared on a homesteading site.
Benefits of Homemade Incubators for Health and Lifestyle
Building your own incubator offers more than just chicks—it enhances your well-being and self-reliance.
Health Benefits
- Physical Activity: Assembling and monitoring the incubator encourages movement, supporting cardiovascular health, per CDC guidelines.
- Stress Relief: Caring for eggs provides a mindful hobby, reducing anxiety, per a 2021 Journal of Health Psychology study.
- Fresh Eggs: Home-hatched chickens supply nutrient-rich eggs, boosting diet quality, per Nutrition Reviews.
Lifestyle Gains
- Cost Savings: A homemade setup costs under $20, versus $50+ for commercial models.
- Education: Teaches kids or adults about biology and farming, fostering responsibility.
- Sustainability: Reduces reliance on factory farming, aligning with eco-conscious living.
Why It’s Worth It
This project connects you to nature, offering physical and mental health perks while producing food, ideal for families or retirees.
Conclusion
What materials do I need to build an incubator?
A water bottle, light bulb, thermometer, hygrometer, and sponge are the basics.
How long does it take to hatch eggs?
Chicken eggs take 21 days with proper temperature and humidity.
What if the temperature fluctuates?
Adjust the bulb height or use a dimmer to maintain 99.5°F (37.5°C).
Is it safe for beginners?
Yes, with careful monitoring and these steps, beginners can succeed.
Building a homemade egg incubator is a fun, affordable way to hatch chicks and enhance your health and self-sufficiency. Follow the steps, monitor conditions, and enjoy the process. Visit our website for more homesteading tips. Note: This content is for informational purposes only and does not replace professional medical advice.